Adding a Gender Value
The Customer Setup form on the CRM module also includes Gender child form. The Gender child form gives the user an ability to add and update the gender value. By default, Male and Female are the two gender values available in the system. User can use this child form to add and edit new gender value on the customer setup page as per their association need and the same can be used for individuals to add or update their gender value.
To add a new gender value:
-
Go to the CRM module and expand the Overview group item.
-
Click the Customer Setup group item link to open the Customer Setup form.
-
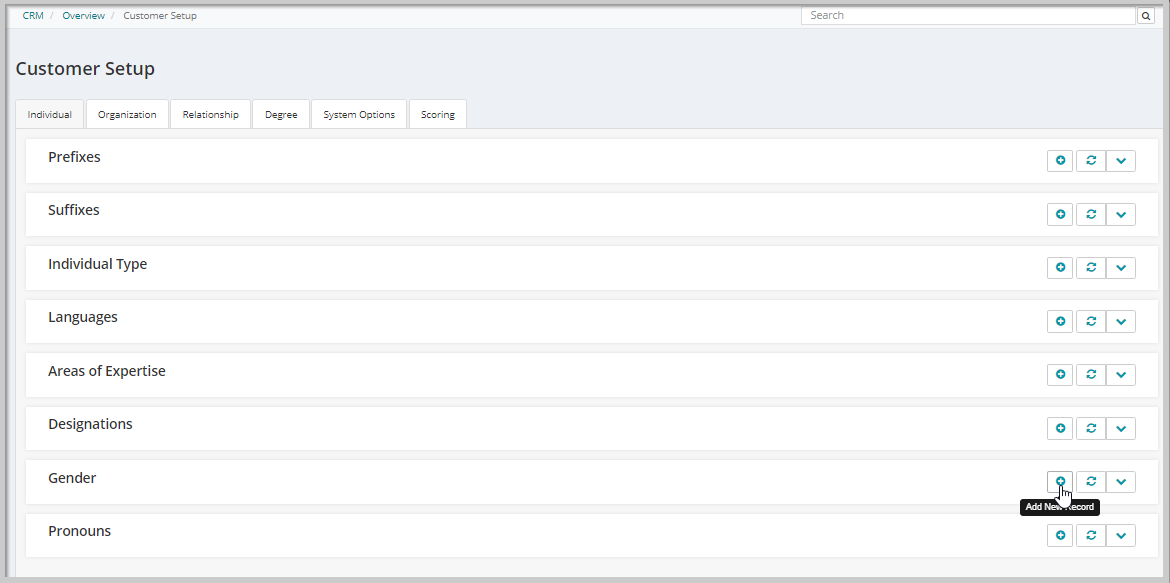
Locate Gender child form and click the Add New Record icon. The Add Gender form gets displayed.
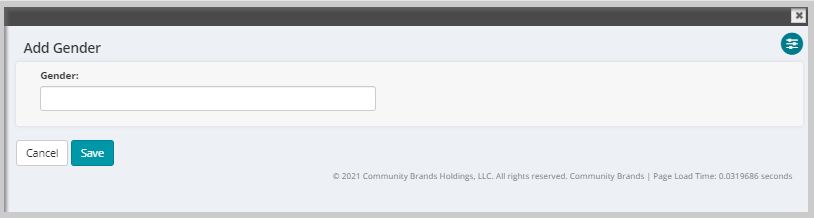
- Enter the desired gender value in the Gender field and click Save.
-
The newly added value will now reflect on the Gender child form.
Note: The system will not allow to save a blank value in the Gender field. Also, the maximum character length for adding a gender value is 30.
Updating a Gender Value
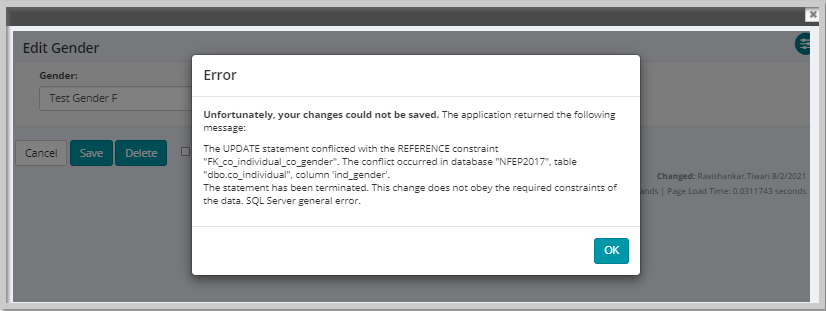
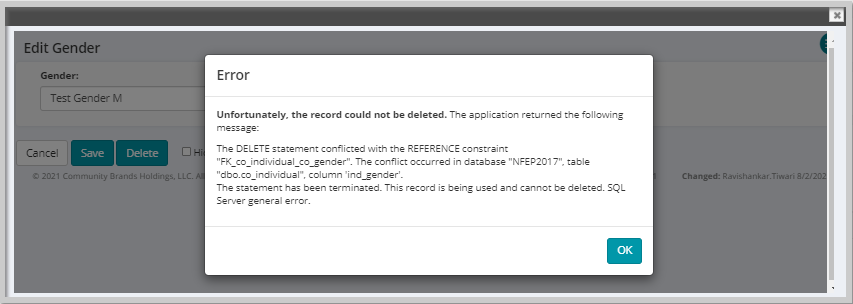
Important! User can only update the Gender values which are not in use that is, a gender value already assigned to an individual cannot be changed. The system throws an error as shown below when user tries to update a Gender value in use.
To edit a Gender value:
-
Go to the CRM module and expand the Overview group item.
-
Click the Customer Setup group item link to open the Customer Setup form.
-
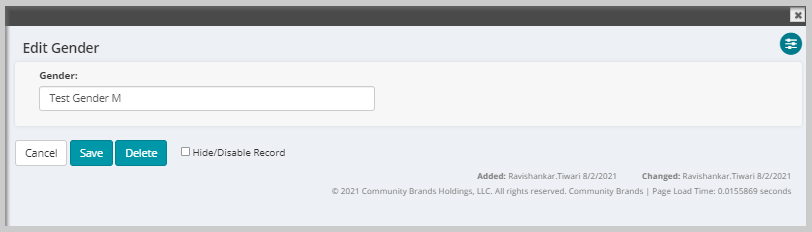
Expand the Gender child form and click the Edit icon on the gender value which you want to update. The Edit Gender form gets displayed.
Make sure the Gender value is not in use by any individual.
-
Update the Gender field with the desired value and then click Save.
The updated gender value will reflect on the Gender child form.
Deleting a Gender Value
Deleting a gender value depends on the value set in the DeleteMethod system option.
If the DeleteMethod system option is set to hard:
Users can only delete those gender values which are not assigned to individuals. When user tries to delete the gender value which are assigned to individuals then the system displays below error.
If the DeleteMethod system option is set to soft:
Users can delete gender values which are in use as well as which are not in use.
For the gender values which are in use: If user deletes a gender value, the deleted gender value will be removed from the Gender child form and no longer be available for future use. The deleted gender value still reflects on individual’s demographics page on which the gender value was already assigned prior to deleting the gender value from the Gender child form. If the individual changes the deleted gender value to some other gender value on the individual’s demographics page, then the deleted gender value no longer be available in the Gender drop-down field for selection.
Follow the below mentioned steps to delete gender value:
To delete a gender value:
-
Go to the CRM module and expand the Overview group item.
-
Click the Customer Setup group item link to open the Customer Setup form.
-
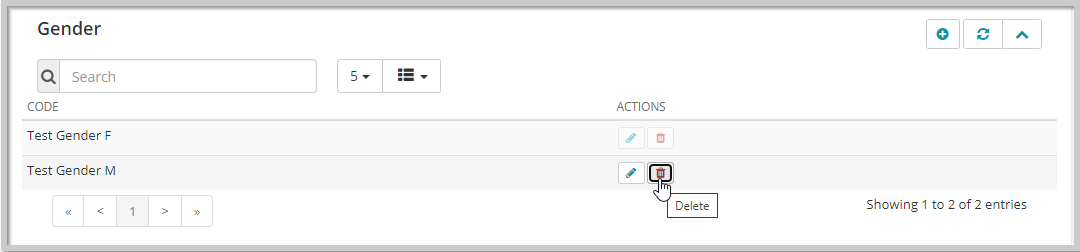
Expand the Gender child form and click the Delete icon on the gender value which you want to delete.
OR
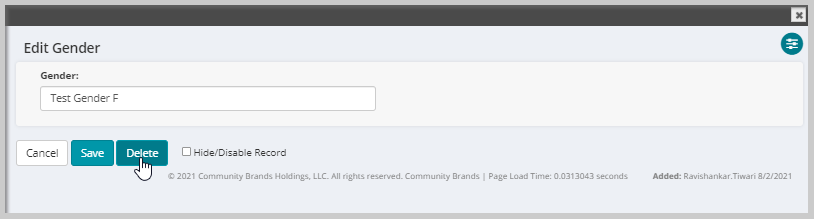
On the Edit Gender form, click the Delete button.
-
From the displayed pop-up window, click the OK button to confirm the delete task or click Cancel button to go back to the previous form.
-
Once clicking the OK button will remove the gender line-item value from the Gender child form.
Using the gender value
To use the newly added gender value:
-
Go to the individual profile, click the Edit profile menu, and then click the Demographic link.
This displays Edit Individual Demographics form.
-
Under the Personal Information section, click the Gender drop-down field and select a gender value option from the list and then click Save.
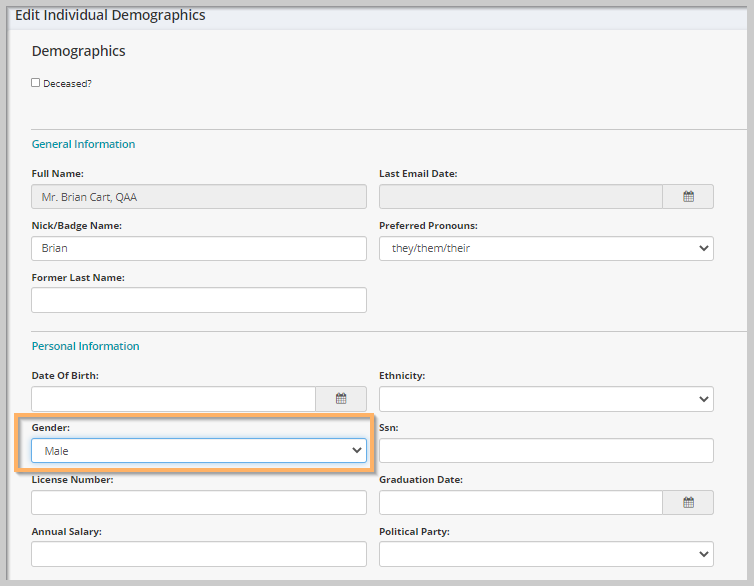
The set gender value gets updated under the Edit Demographics form of the individual profile.
Similarly, you can update the existing gender option or remove the Gender value using the Gender field on the Edit Individual Demographics form.